RACK OF LAMB with Pistachio & Herb Crust
The showpiece cut. Worth every second of the prep.
A frenched rack of lamb is one of those cuts that looks like it belongs in a restaurant and cooks like it belongs outdoors.
The bones make it easy to handle over heat, the eye of the rack is small and cooks fast, and the pistachio and herb crust gives you colour, crunch, and a nuttiness that pairs perfectly with the sweetness of the lamb.
It is a cook that rewards attention to detail at the prep stage.
The crust is the key. Pistachios, parsley, rosemary, lemon zest, garlic, and good olive oil, blitzed together and pressed firmly onto the fat cap before the rack goes on the fire. The fat renders slowly, the crust sets and crisps, and the lamb underneath stays pink and tender.
Get the internal temperature right and this one is hard to beat.
This recipe works on a kettle BBQ with the lid on, in a camp oven over coals, or directly on a grill grate with the bones shielded from direct flame. The method is the same regardless of the fire.
Serves 2 to 3 (one rack)
Prep Time 25 minutes
Cook Time 18 to 22 minutes
Rest Time 10 minutes
Fire Setup Two-zone indirect heat, kettle BBQ or camp oven
Target Temp 58 to 60 degrees C internal (medium-rare)
Difficulty Intermediate
INGREDIENTS: THE RACK
1 Frenched rack of lamb (6 to 8 cutlets), fat cap scored lightly
2 tbsp Dijon mustard
1 tbsp Olive oil
Flaky sea salt and cracked black pepper
INGREDIENTS: PISTACHIO AND HERB CRUST
80 g Shelled pistachios, roughly chopped
1/2 cup Flat-leaf parsley, finely chopped
1 tbsp Fresh rosemary, finely chopped
2 cloves Garlic, minced
1 tsp Lemon zest
3 tbsp Olive oil
Flaky sea salt and cracked black pepper to taste
INGREDIENTS: TO SERVE
Mint jelly or pomegranate molasses
Lemon wedges
Extra fresh herbs
METHOD
01. FRENCH THE RACK
If your butcher has not already frenched the rack, use your Classic Chef's Knife to clean the bones. Score between each rib bone, then scrape the meat and sinew cleanly from the last 4 to 5 cm of each bone. A clean bone presentation makes the finished rack look the part and prevents the bone ends from burning over the fire.
→ Score the fat cap in a crosshatch pattern with shallow cuts to help it render evenly.
02. SEASON AND REST
Pat the rack dry with paper towel. Season generously with flaky salt and cracked pepper on all sides. Leave uncovered at room temperature for 20 minutes before cooking. A dry surface is essential for a good crust.
→ Do not skip the resting at room temperature. Cold meat straight from the fridge cooks unevenly.
03. MAKE THE PISTACHIO CRUST
Combine the chopped pistachios, parsley, rosemary, garlic, and lemon zest in a bowl. Add the olive oil and mix until it comes together into a coarse, press-able paste. Season with salt and pepper. The mixture should hold its
shape when pressed between your fingers.
→ Chop the pistachios by hand rather than blitzing them. You want texture, not a paste.
04. SET UP THE FIRE
For a kettle BBQ, bank coals to one side for indirect heat. For a camp oven, build a bed of coals and allow them to settle to a medium heat before placing the oven. You are aiming for an ambient temperature of around 200 degrees C. Place a small piece of wood or a handful of smoking chips on the coals for a subtle smoke note if desired.
→ Wrap the exposed bone ends in foil to prevent them from charring before the meat is done.
05. SEAR THE RACK
Brush the fat cap and meat side of the rack with Dijon mustard. Place the rack fat-side down directly over the coals for 2 to 3 minutes until the fat starts to colour and render. Flip and sear the meat side for 1 minute. This step builds flavour and creates a surface for the crust to adhere to.
→ Work quickly here. You are building colour, not cooking the rack through.
06. APPLY THE CRUST AND COOK INDIRECT
Move the rack to the indirect side of the BBQ, bones pointing up, fat cap facing the heat source. Press the pistachio and herb crust firmly onto the fat cap and exposed meat. Close the lid and cook for 15 to 18 minutes, or until the internal temperature reads 58 to 60 degrees C at the thickest part of the eye.
→ Check temperature from the side, keeping the probe away from the bone which conducts heat differently.
07. REST THE RACK
Remove the rack from the heat and rest it loosely tented with foil for 10 minutes. The internal temperature will continue to rise by 2 to 3 degrees during the rest. Do not skip this step. Cutting too early loses the juices you have worked to keep.
→ Rest on a warm board or plate, not a cold surface, to avoid drawing heat from the meat.
08. CARVE AND SERVE
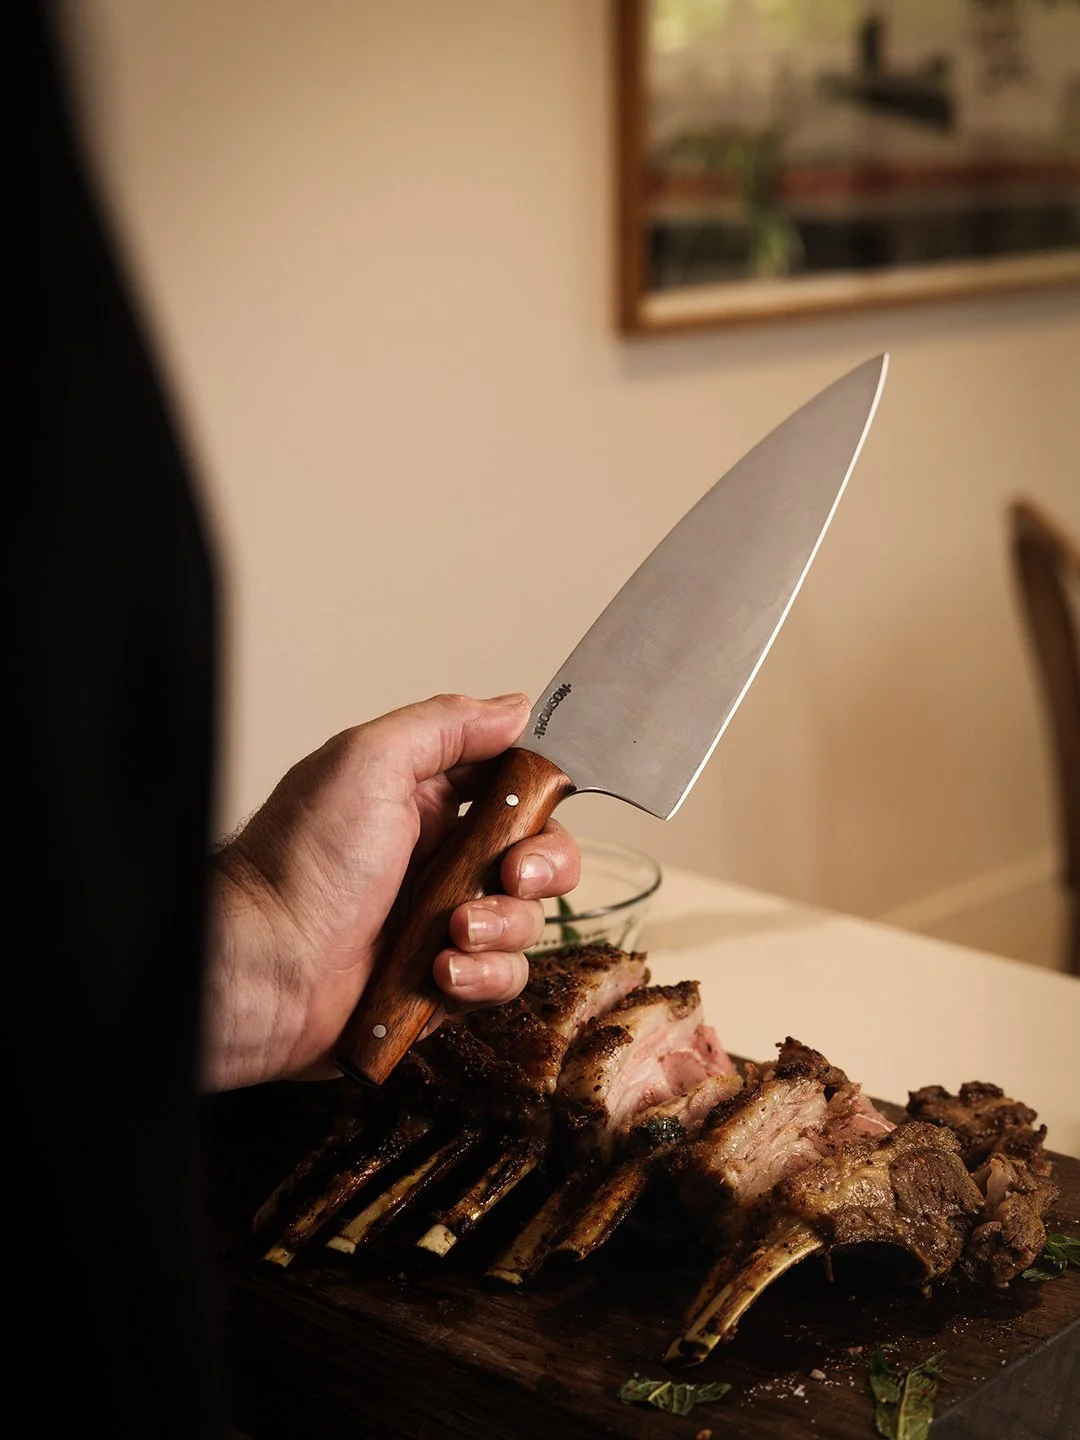
Use your Slicer - Forged Finish to carve between each rib bone with a single clean downward stroke. The long blade gives you the control to follow the bone without sawing. Arrange the cutlets on a board or platter, crust facing up. Serve immediately with mint jelly or pomegranate molasses, lemon wedges, and fresh herbs.
→ One clean cut per cutlet. Let the knife do the work.
SERVE WITH
Warm flatbreads or grilled sourdough to catch the juices. A simple green salad with shaved fennel and lemon dressing. Roasted kipfler potatoes with rosemary and garlic. A glass of Barossa Shiraz or a medium-bodied Grenache.
THE RIGHT KNIFE
A rack of lamb rewards precise knife work at every stage. Frenching the bones cleanly, scoring the fat cap, and carving between the cutlets without tearing the crust all require a blade that is sharp, confident, and well-balanced in the hand. The Classic Chef's Knife handles the prep. The Classic Chef’s Slicer handles the carve. The Steak Knives handle the table. Three knives, one cook, no compromise.
Classic Chef's Knife · from $280